
Journal
How to Sterilise MAM Bottles: 2026 Method Guide
Ellie Marsh · · 7 min read
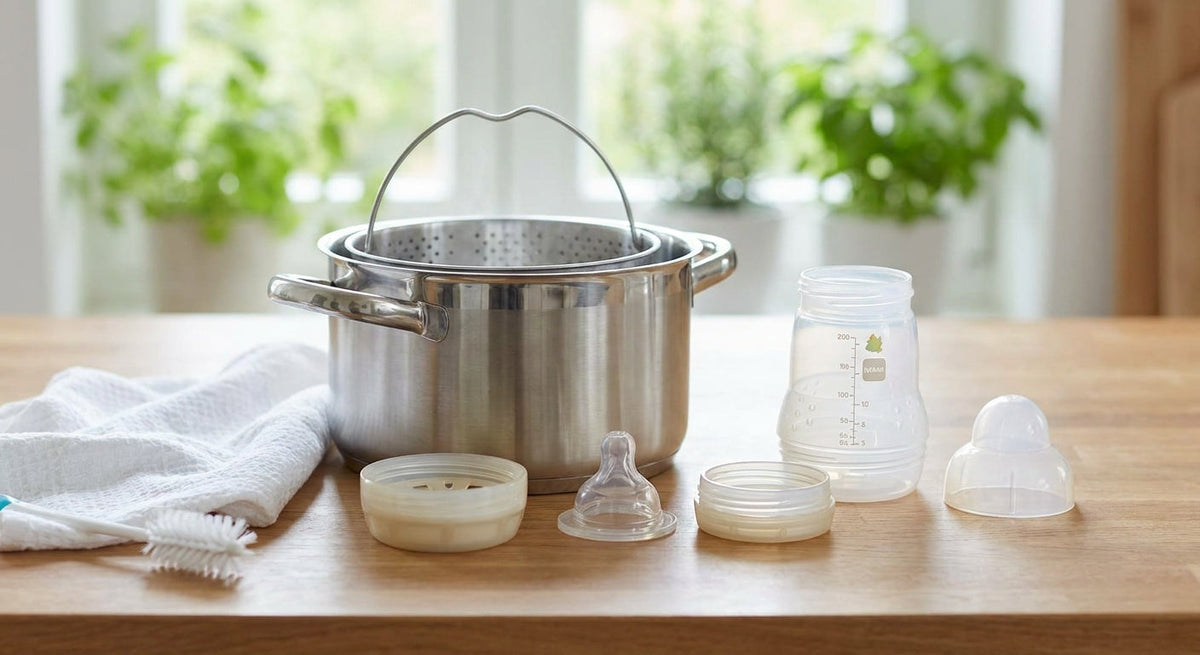
Sterilising MAM anti-colic bottles correctly protects your baby from bacteria while keeping that anti-colic valve working the way it's designed to. This guide walks through every method - steam, cold water and boiling - plus the one assembly mistake that ruins the anti-colic function more than anything else.
- Sterilise MAM anti-colic bottles until your baby turns 12 months old, per standard NHS guidance.
- Steam sterilisers kill bacteria in 90 seconds to 8 minutes - the fastest method for daily use in 2026.
- Cold water sterilising solution needs a full 30-minute soak and stays effective for 24 hours.
- The MAM anti-colic valve must sit flat with no folds or it stops venting air properly - the top mistake parents make.
- Wash every part in hot soapy water before sterilising - sterilising alone does not remove milk residue.
Why this matters
A baby's immune system in the first year can't fight off bacteria the way an adult's can, which is why sterilising bottles remains standard practice through 2026 for anything a newborn puts in their mouth. MAM's anti-colic bottles add a second reason to get this right: the valve at the base only works if it's clean, dry, and seated correctly.
Get the valve wrong after sterilising and you'll be back to the windy, gulping feeds the bottle was bought to fix in the first place. Parents shopping the anti-colic bottles for windy babies range at The Tiny Traders ask about this constantly - the bottle isn't the problem, the reassembly usually is.
What you'll need
- MAM anti-colic bottles, fully disassembled (bottle body, teat, collar, and the anti-colic valve)
- Washing-up liquid and a dedicated bottle brush (never a sponge used for other dishes)
- A steam steriliser, cold water sterilising tablets/solution, or a large pan for boiling
- Clean tongs or freshly washed hands for handling sterilised parts
- A clean, dry surface or rack to air-dry components
- 10-30 minutes depending on your chosen method
The steps
1. Take the bottle apart completely
MAM anti-colic bottles have four separate pieces: the bottle body, the silk or silicone teat, the screw collar, and the anti-colic valve underneath the collar. Every piece needs to come apart before washing or sterilising - a bottle sterilised whole still has bacteria trapped in the valve seams. Common mistake: leaving the valve clipped to the collar, which stops water or steam reaching the underside.
2. Wash every part in hot, soapy water first
Sterilising kills bacteria - it does not remove dried milk or formula residue. Wash each piece by hand in hot water with washing-up liquid, using the bottle brush to reach the inside of the teat, and rinse under running water until no cloudiness remains. Skipping this step is the single biggest reason parents see white buildup inside bottles after weeks of sterilising in 2026.
3. Choose your sterilising method
All three standard methods work for MAM bottles; pick based on how many feeds you're preparing per day.
- Steam sterilising (electric or microwave): cycles run 90 seconds to 8 minutes depending on the unit, and bottles stay sterile for up to 24 hours if the lid stays closed.
- Cold water sterilising: submerge parts fully in solution or a dissolved tablet for 30 minutes, weighing pieces down so nothing floats above the surface. Solution needs replacing every 24 hours.
- Boiling: fully submerge parts in a pan of water at a rolling boil for 10 minutes. This is the cheapest method but hardest on silicone teats over time - expect to replace teats more often.
4. Handle sterilised parts with clean hands or tongs
Once the cycle finishes, touch only the outside of the bottle body and the outer edge of the teat. Fingers on the inside of the teat or the valve surface reintroduce bacteria you just eliminated. If you're prepping several feeds ahead, reassemble bottles immediately rather than leaving loose parts on the side.
5. Reassemble the anti-colic valve correctly
This is where most parents go wrong. The MAM valve sits flat inside the collar with no creases or folds - a folded valve blocks the air-venting channel that gives the bottle its anti-colic effect. Push the valve in gently until it sits flush, then screw the collar down without over-tightening, which can also distort the valve shape.
6. Air-dry on a clean rack before storing
Don't towel-dry parts - the fabric introduces fibres and bacteria straight back onto surfaces you just sterilised. Leave everything on a dedicated drying rack until fully dry, then store assembled or in a clean, covered container.
7. Know when you can stop sterilising
Standard guidance is to sterilise bottles until your baby's first birthday, since that's roughly when a child's immune system handles everyday bacteria without extra support. After 12 months, thorough washing in hot soapy water or a dishwasher cycle at 60°C is generally considered sufficient.


Troubleshooting
- White residue after dishwasher cycles: hard water mineral buildup, not bacteria - soak parts in a vinegar-water solution for 15 minutes, then rinse thoroughly.
- Valve won't sit flat: the valve has likely folded during washing - press it flat on a clean surface before reinserting rather than forcing it into the collar.
- Steam steriliser smells of plastic: descale the unit with a vinegar-water mix monthly; mineral deposits on the heating element cause this, not the bottles.
- Bottles look cloudy despite washing: run an extra boiling cycle at 100°C for 10 minutes - cloudiness usually means dried formula residue baked into the plastic.
- Teat collapsing during feeds: this points to a blocked or misaligned valve, not a faulty teat - remove, flatten, and reseat the valve before replacing anything.
- Cold water tablets not dissolving fully: use lukewarm rather than cold water and stir briefly - fully cold water slows dissolving and weakens the solution.
Tools and resources
- Steam steriliser or a dedicated sterilising pan reserved for baby items only
- Cold water sterilising tablets, replaced every 24 hours per pack instructions
- A bottle brush kept separate from general washing-up sponges
- The anti-colic bottles for windy babies guide for choosing the right bottle size and teat flow before you start sterilising a new set
- The combination feeding bottles guide if you're mixing breast and bottle and want to compare valve designs across brands
What to do next
Once sterilising is part of your routine, the next thing worth sorting is settling a windy baby between feeds - a well-sterilised, correctly-assembled MAM bottle only solves half the problem if trapped air is still building up after burping. The baby bouncers for colicky babies guide covers positioning and movement that helps babies bring up wind after a feed.
FAQ
How long do you sterilise MAM anti-colic bottles for?
Steam sterilisers run 90 seconds to 8 minutes, cold water sterilising needs a 30-minute soak, and boiling takes 10 minutes at a rolling boil. All three methods are considered effective for MAM anti-colic bottles when parts are fully submerged or exposed.
Do you need to sterilise the anti-colic valve separately?
Yes, the valve must be removed from the collar before washing and sterilising. Leaving it attached traps residue and bacteria in the valve seams, which is the most common reason MAM bottles stop venting properly.
Can you sterilise MAM bottles in the microwave?
Yes, using a microwave steam steriliser designed for baby bottles - cycles typically run under 8 minutes depending on wattage. Check the steriliser's instructions for exact timing, as microwave power varies between models.
How often do MAM anti-colic bottles need replacing?
Replace teats when they look cloudy, sticky, or swollen, and replace the anti-colic valve if it stays folded or won't seat flat after washing. Most parents replace teats every one to two months with regular boiling, sooner than with steam sterilising alone.
Is cold water sterilising as effective as steam?
Cold water sterilising is effective when parts are fully submerged for the full 30 minutes and the solution is replaced every 24 hours. It takes longer than steam but needs no electricity, making it a common backup method.
What age can you stop sterilising baby bottles?
Standard guidance points to around 12 months, once a baby's immune system handles everyday bacteria without extra support. After that, thorough washing in hot soapy water or a 60°C dishwasher cycle is generally considered enough.
Why does my MAM bottle still leak or splutter after sterilising?
A leaking or spluttering MAM bottle almost always means the anti-colic valve is folded, misaligned, or missing after reassembly. Remove the collar, check the valve sits flat, and reseat it before using the bottle again.
Can you put MAM bottles in the dishwasher instead of sterilising?
A dishwasher cycle cleans MAM bottles but does not sterilise them to the same standard as steam, cold water, or boiling methods for babies under 12 months. Use the dishwasher for everyday washing and a dedicated sterilising method as the final step.
One last thing
The detail parents miss most in 2026 isn't the sterilising method - it's over-tightening the collar during reassembly. A collar screwed on too tight compresses the anti-colic valve out of shape even when it went in flat, which quietly cancels out the whole point of buying an anti-colic bottle. Screw it on snug, stop as soon as it resists, and check the valve still sits flat before the next feed.


